Friday, 26 June 2015

Watercraft

Our final class of this session: designing, building and testing boats.  Lots of decisions to make when making a vessel that's seaworthy and visually interesting. What materials will be buoyant, waterproof and light enough to allow for propulsion through water? What overall shape is streamlined enough, stable and will stay on course?


Testing was an important part of this class.


This bottle provides lots of potential buoyancy….


But a round-bottomed hull and a high centre of gravity was susceptible to rolling -especially in calm water!


A flat-bottomed hull like this pontoon style boat design was far more stable in this situation. 


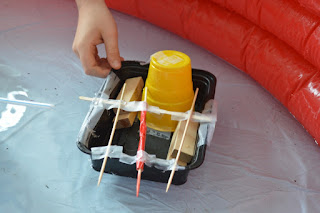
Some boats had extra floats for added buoyancy.


Some vessels used jet propulsion (with the aid of a balloon) to move through the water. We discovered that this worked best when the design was very light, like this example above.


Other boats were designed for wind power and came equipped with sails and a complex of masts (with a crow's nest up top).


Small streamlined boats (like these speedboat type designs) can move quickly by planing over the water. They are highly manoeuvrable.

Time to test how much load the boats can carry.


This slipper boat could only carry a small load.


Whereas this large very buoyant flat-hulled vessel was like a tanker-almost unsinkable!


Each design had its own story. There is a comfortably furnished army boat, a pirate tugboat and even a torpedo porcupine boat. 

Boats Ahoy!

Wednesday, 10 June 2015

Give me shelter

This week we gave the kids quite a limited set of building materials and asked them to construct a hideaway, with enough space for at least one person and sturdy enough to withstand a storm. 
                    
One industrious team used rolled up paper rods and cardboard tubing to construct a rectangular frame structure.


They had to deal with some classic construction issues caused by compression forces. What to do when your frame buckles in the middle? Either add more crossbars or "maybe we should use stronger material?"


In the end turning the frame on its side helped a bit- broader base, less height. Once a canvas was flipped over the frame it made for a cosy two person hideaway.


Another student decided to use the corrugated cardboard to construct a hut with curvilinear sides. This bypasses the need for a rod-based frame and has the advantage of creating a self-supporting wall.


Secure joints are important in a rod frame.


This student constructed a rod frame to make a pod like lean-to. He hung joined paper rods from the coat pegs on the wall and used a cardboard tube as a supporting strut. Next he put a layer of paper as a covering and then draped a sheet on top to enclose the structure. Pretty neat.


These students made a shelter with cardboard tubes, tape and blind frets and a corrugated card cover. Peek underneath and you can see a good structural detail: the addition of stops at the frame base to prevent the tubes from slipping out. There was a lot of enthusiasm for the testing stage of their design: turns out this structure can withstand a serious tornado!


Camping out!

Monday, 8 June 2015

Club Ex


This week we focused on the experience of joining a club. 

What new and original club might we invent and how could we make it a really good place for kids (real or virtual)? This is designing an experience in an organization and it requires the kids imagine themselves in that club. 


First step: design a name and logo. How about the Ninja Club? 


Or the combination Alice in Wonderland Tropical Club with a cheshire cat beach ball? 

Brochure Warning: "Only come to our website if you suffer from nightmares or crazy ideas. May be pictures of things that will make you have a heart attack because you are laughing so hard".


Next step: how to promote the club? Some kids made paper prototypes of websites. This is a practise that some web developers use to first discuss a web design with their clients. By stripping away the moving graphics of the computer, it's easier to focus on the information that the user might need. Other kids designed brochures. Both items involve layout and content design.


At the kids' shopping club, members are given an allowance and meet up at popular stores to shop til they drop. Subsidies are available for kids that need them.

At the food club, young people collaborate to decide on  a menu, cook it and then share interesting and new tastes with one another.

At Bugs R US there is a fully equipped nature centre. Kids are taught how to handle the bugs with care and may also see local reptiles and birds.


These students worked on a system of secure membership cards for the tech club with fingerprint ID.