Friday 27 February 2015

Setting the scene

The audience is waiting. Lights dimmed.Cellphones off. A hush through the theatre. The curtains draw back….


Stars twinkle down on a crackling campfire in this outdoor scene.


This week we captured that magical moment with our set design workshop. The challenge: how to make a story come alive on stage. In this workshop we are set designers and production managers.


Since kids are instantly compelled to imagine stories, they easily grasped the idea of using a scenic back-drop to establish the time and place of a play.

A good set can also give dramatic context for the mood of a story. How can we use the space, colours, textures, shapes to create a particular atmosphere? Is the story scary, funny or just plain weird?
This gloomy blackened interior had a touch of Ibsen about it…


And sometimes, a set can also give us hints about the characters.


Amongst these puppets, the protagonist is an aspiring mad scientist -who turns her bedroom into a laboratory. The table in her bedroom is filled with test tubes and beakers.

Three of our student designers decided to tackle Jurassic Park. One of them ambitiously merged Jurassic Park with Star Wars and embarked on a fusion set. We were impressed at how three children working side by side, happily created their own designs on the same theme, with enthusiastic cross-pollination. In one Jurassic park, the set was multi-purpose. One configuration showed a lush prehistoric forest. Flip the flooring over and reverse the trees and you get a sleek research laboratory. This student took on the challenge to create a set that transforms over time. 

Nice foreground layering elements- add to the depth in this forest.

Some of our designers used the set to create a story of their own: Good day, bad day. The narrative arose out of the design. This part of the set shows Boby Joy's bedroom, with a fake turf play area. 


And this set, with its blocky characters is based on the computer game Minecraft. A team of designers brainstormed on how to turn this video activity into a stage concept. 


Stairs pass through the foreground into the audience.


Wednesday 18 February 2015

Ready, Set, Go?

This week, the challenge was to build and test junk-mobiles for speed and durability.


The first phase of this task was to put together the buggy by making wheels on axles and attaching them to the chassis or body. A wheel and axis unit is a simple machine-but it's not necessarily simple to make it work well as part of a buggy!

image from http://www.education.com

Lots of design choices were made here- the number, size and positioning of the wheels and axles, the type of axle and the shape, size and material of the chassis. In our design brief we asked the kids to make sure the wheels and axle could freely spin and that the whole buggy would be light but sturdy.


Now to get down to testing. Ready, set, go!! What happens when we launch our buggy down an incline? There's the sheer delight of making something that moves of course. It's equally fun to see what happens when you smash your truck into the wall at top speed.


Some vehicles do unintended stunts! A complete 180 degree turn or interlocking wheels for the girls' team trucks. One intrepid truck climbs on top of another one. This can be fun, but the design brief is to try and make the buggy to go straight. Time to make sure the axles are parallel and the wheels aligned.


The classic wonky wheel problem is common. These CD wheels are nice and big -which means they have a higher gear ratio than little wheels. Their lightness is generally good too-because the buggy is not weighed down by its wheels. But-there's a bit of an issue with their tendency to flop over.


In this car. a design solution was using foam blocks to keep the wheels straight. Unfortunately this was not sturdy enough to support the chassis without the wheels tilting. Sometimes troubleshooting can be maddening -especially when you are running out of time. 


Here's one way to improve the wobbles. Remove the heavy body. And use attached wheel hubs. This car has a nice streamlined shape. Impressive how this designer worked his way through the design challenge.

A veritable tape marathon to keep the CD wheels straight and non-wavering.

In the second phase of this challenge we asked the kids to add a jet propulsion engine to their buggy. A balloon taped up to a straw is attached to the back of the chassis and works rather like a rocket booster. In theory, the air escaping from the straw-provides thrust which pushes the buggy forwards.


Perhaps two balloons will work better than one?


Best is a balloon with a short straw (to minimize friction for the escaping air). The placement of the balloon (and the direction the nozzle points in) is also critical to how well it works. The elastic quality of the balloon makes a difference too. Some types of balloons work better than others.


This car was light -and low on friction- and sped some way with this nice short balloon nozzle.


Another lightweight car -with three wheels and a craft stick frame -incredibly fast.

This was an great workshop of testing and improvement. Well done kids.


Sunday 15 February 2015

Monster PA Day


We started off the day with a visit to the Monster Factory. We got a demo from designer, Bliss Man on how they design and make their unique plush monsters right here in Toronto.


Each monster comes with a name and backstory.


On to the photography studio at Image Works to learn how they produce their monster-sized prints. Then a engaging tour of the Coldstream Fine Art gallery.

Back to the Invention Studio to make our own creations. Here are some of our fantastic monsters.


                                         This one's reversible.


Monster remix ideas:


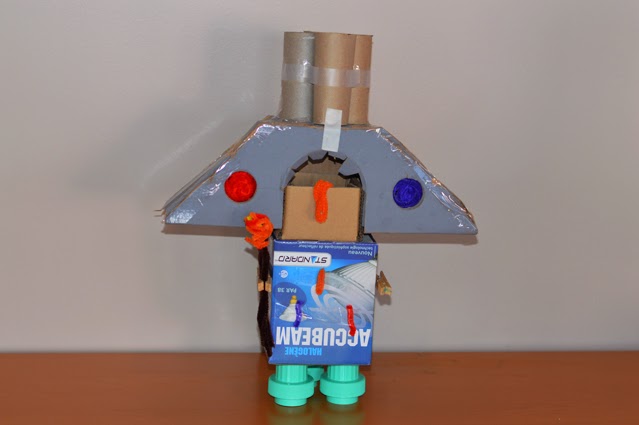
The giant monster bot takes shape:


Here are some of our other monsters:

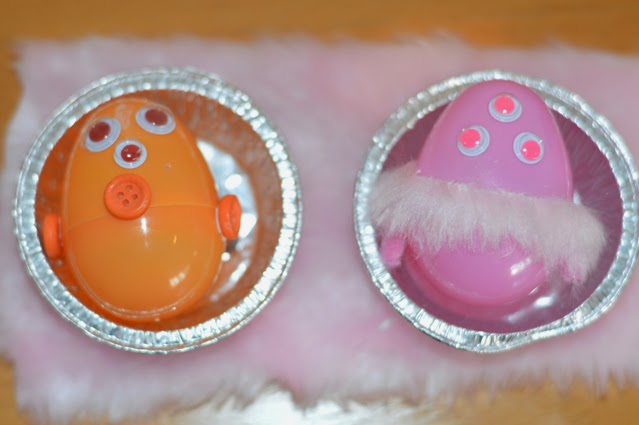
Furry egg ghouls in their nests
                                   

   Cardfoil monster
                                           

     Cyborg Boy
                                     

Octo-cyclop fluff fashion monster

A monstrous day of fun creativity and laughs!

Friday 6 February 2015

Groovy Grub

Can-cheese Flag Logo for Nate's Cheeses


We enter the market area. Dappled sunlight is glinting through the trees around us. What shall we eat today? So many different choices at Nate's Cheeses. I look at the fondue stall. The pots of steaming cheese with crusty bread look so good. My cousin is at a different stall: she's picking out a five cheese personal pizza. Our dad's given us $10 each to spend and we're meeting at the long trestle tables in the middle when we have our food. It's busy here- but I see a waitress dressed in orange, clearing a space for us. We finish our food so quickly. Why do grown-ups eat sooo slowly? My dad sends us to the running track. We burn off those cheese calories in no time at all.


In our class this week, the kids came up with an eatery concept and used their layout to tell the story of a visit to their restaurant. Some of them designed logos and acted out advertisements to show off the theme and special features of their restaurant. Others invented menus and staff uniforms.


Visiting a restaurant-is a social sensory experience. When we walk in, we anticipate the yummy food, take in the decor, the ambience, the other customers. As restaurant designers, we are imagining a customer experience.

This is design in four dimensions with various touch points over time:

What happens when we walk in? What do we see? What is the layout and decor like?


Walk down the cobblestone path into the Paradise Cafe. At the doorway, we are greeted by two servers with giant bird wings. They guide us through the lush forest-like setting, past a swinging lemur and cawing parrots to our picnic table.

What is the setting for the restaurant and how will that affect our experience?


The Tropicolo Cafe is located in a beautiful Caribbean bay. Sitting on the outdoor seating platform (on stilts and flooring, made of local hard wood) we look out at a wonderful ocean view with banana palms and coconut fronds encircling our hut. We feel relaxed as the sun begins to set and the soft glow from tiki lamps surrounds us.


At the Restaurant on the Rails, we're on the move! We enjoy a "very fancy" meal whilst watching the scenery whizz by. Swivel chairs and large windows allow us to take in the view from the ultra-modern bullet train.

What food will be on offer and how does the look of the restaurant mesh with this?


The Buffet of Dessertness is "shaped like a doughnut without the hole in it"

How do we place our order?

As we take our seat at Into the Future motion sensors snap on an illuminated touch screen menu on your table top. Each of us punches in our automated order and robots bring the food to our tables.

At the Buffet of Dessertness we can sample the desserts using a scratch and sniff menu. Small tubes linked to tiny drink pouches, let us try out the drink selection too!


What will the restaurant workers do and what is their workplace like?


At the Pink Elephant Cafe delicious Indian food is served by baby elephants! Each elephant is wearing a dazzling pink and red uniform, with Indian embroidery, beading and tassels and shiny booties.  (Toronto Public Health are of course just fine with this).


The masked servers at the Ninja Restaurant are surprisingly polite with customers. 


Is this a good place to hangout with friends and family?

At the Paradise Cafe we can take in an animal show after our meal. Kids get to sit on the long comfy sofa up front.

A cow-fork jumps over the moon at Sueleh's All Day Meals.


Thanks to local restaurant  Sweet Lulu for providing us menu and logo samples to look at.