Showing posts with label prototyping. Show all posts

Thursday, 28 April 2016

On your marks..Get set..Go

This week, the challenge was to build and test junk-mobiles for speed and durability.


The first phase of this task was to put together the buggy by making wheels on axles and attaching them to the chassis or body. A wheel and axis unit is a simple machine-but it's not necessarily simple to make it work well as part of a buggy!

image from http://www.education.com

Lots of design choices were made here- the number, size and positioning of the wheels and axles, the type of axle and the shape, size and material of the chassis. In our design brief we asked the kids to make sure the wheels and axle could freely spin and that the whole buggy would be light but sturdy.


Now to get down to testing. Ready, set, go!! What happens when we launch our buggy down an incline? There's the sheer delight of making something that moves of course. It's equally fun to see what happens when you smash your truck into the wall at top speed.


Some vehicles do unintended stunts! A complete 180 degree turn or interlocking wheels for the girls' team trucks. One intrepid truck climbs on top of another one. This can be fun, but the design brief is to try and make the buggy to go straight. Time to make sure the axles are parallel and the wheels aligned.


The classic wonky wheel problem is common. These CD wheels are nice and big -which means they have a higher gear ratio than little wheels. Their lightness is generally good too-because the buggy is not weighed down by its wheels. But-there's a bit of an issue with their tendency to flop over.


This triangular chassis helps to stabilize the axles and makes this large buggy quite successful.  


In this car. a design solution was using foam blocks to keep the wheels straight. Unfortunately this was not sturdy enough to support the chassis without the wheels tilting. Sometimes troubleshooting can be maddening -especially when you are running out of time. A veritable tape marathon to keep the CD wheels straight and non-wavering.


In this car, lateral movement of the axles makes the buggy turn corners.

In the second phase of this challenge we asked the kids to add a jet propulsion engine to their buggy. A balloon taped up to a straw is attached to the back of the chassis and works rather like a rocket booster. In theory, the air escaping from the straw-provides thrust which pushes the buggy forwards.


Perhaps two balloons will work better than one?


Best is a balloon with a short straw (to minimize friction for the escaping air). The placement of the balloon (and the direction the nozzle points in) is also critical to how well it works. The elastic quality of the balloon makes a difference too. Some types of balloons work better than others.


This car was light -and low on friction- and sped some way with this nice short balloon nozzle.

The finishing touch: add your own logo to the racing car to give it a personal touch. This was an great workshop of testing and improvement. Well done kids.


These design workshops are made possible  by the Toronto Arts Council.

Sunday, 4 October 2015

Prototyping Play


In our first class of the Fall 2015 season we asked children at TP Loblaw Boys and Girls Club to design toys for toddlers. The goal for this intro. session is to have fun prototyping (building a model version of an invention). We want them to turn their ideas into something tangible and to get comfortable with construction. 


All of our students invented toys with the senses in mind. Out  of a large mound of materials, emerged a twisting fur rattle, a wearable play centre, a whole collection of colourful crib toys, a bug twister, a mini golf set and a toddler music zone. 


                                           Here's a colourful hand rattle. 


This music zone toy, evolved as a team effort over the course of the hour long session. The inventors were careful to consider safety elements -the xylophone is squishy with soft wackers. This class introduces the kids to the concept that inventions and designs are for someone: the "user". When we're designing for someone else- it's a good idea to think about who they are and what they need or want. Better still ask them! The students had a lot of enthusiasm for this project because many of them have little sisters and brothers. So in this case empathy and understanding of the user come naturally.


This wearable toy monopolized on the fun factor. The striped cloak is decorated with knotted foam bits and crunchy mylar. The furry headband includes plenty of textured elements to explore with little fingers.


This rotating fur rattle incorporates moveable textured knobs and a reflective base.


And here's the bug stick. Baby has a selection of brightly coloured balls to twist and a bonus fly to chew on! This student worked hard to secure the beads onto the stick so that a baby couldn't pull them off.


At the end of the session in our demo time, our students had a chance to reflect on what they have designed. They explain the invention concept and why it will be suitable for toddlers. 

Well done kids. Can't wait to see what you invent next!

Thursday, 30 April 2015

Pickup device

This week we tackle an every day problem: how could we make carrying multiple grocery bags an easier task? More specifically, how do we stop the bags snarling up together and digging into our skin? Is there a better way to distribute the weight? Could we take some of the load off our hands? How could we make the task altogether more fun?


This hand held device nicely distributed the load of four bags around a good firm carrying handle. Clips were used to secure the bags.


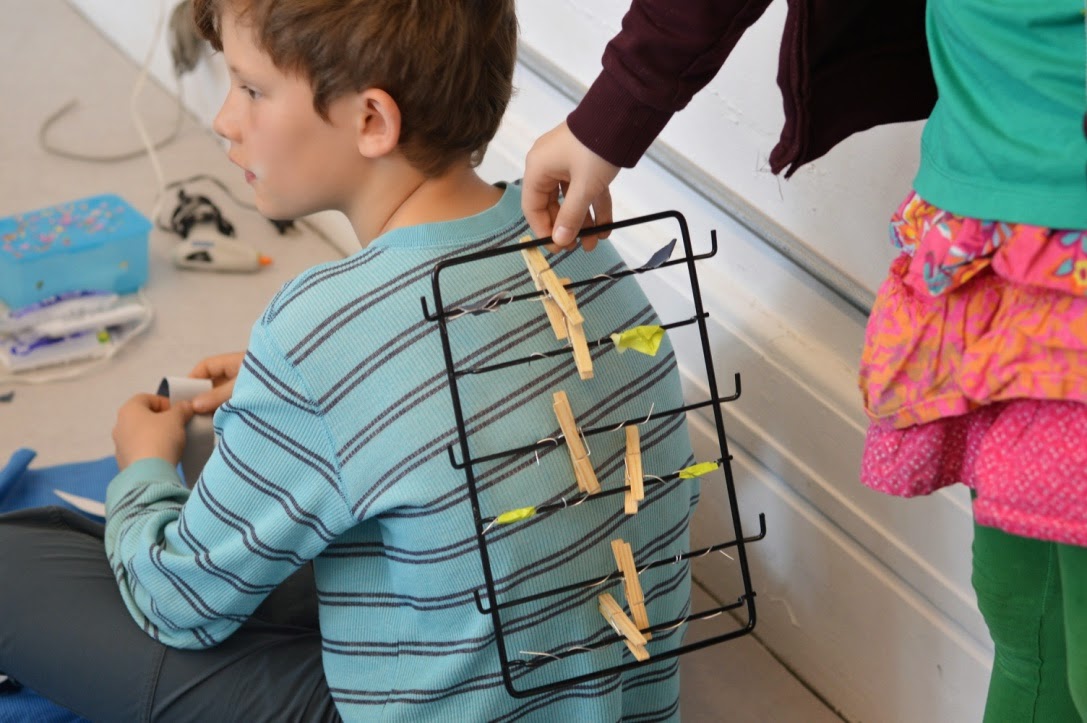
This is the start of a backpack carrier, with lots of firmly secured clips and hooks for the grocery bags.


This hands-free solution is attached around the waist.


Designer testing revealed that it might be useful to leave the buckles flexible (rather than rigid) to allow the user to "squeeze through small spaces".  Good thought. Might want to modify further to prevent the bags from slipping off the rods?


Several of our students decided to update the granny cart and used wheels on their carriers. 


This pickup device is a travelling robot carrier. 


Forget about the bags! What about the bugs? It's time they went for a ride. In this ant transportation system, a whole nest of ants can explore the zig-zag tunnels whilst on the move. Next step adding wheels and a motor…


This design is a carrier with retractable hooks. This inventor went one step further. The carrier can be attached to the wall and the hooks hang down whilst you unpack your groceries. Once done, the hook is mechanically pulled up (she prototyped this with a accordion string design) and pegged flat against the wall.  We liked the multistep thinking here.

Wednesday, 18 February 2015

Ready, Set, Go?

This week, the challenge was to build and test junk-mobiles for speed and durability.


The first phase of this task was to put together the buggy by making wheels on axles and attaching them to the chassis or body. A wheel and axis unit is a simple machine-but it's not necessarily simple to make it work well as part of a buggy!

image from http://www.education.com

Lots of design choices were made here- the number, size and positioning of the wheels and axles, the type of axle and the shape, size and material of the chassis. In our design brief we asked the kids to make sure the wheels and axle could freely spin and that the whole buggy would be light but sturdy.


Now to get down to testing. Ready, set, go!! What happens when we launch our buggy down an incline? There's the sheer delight of making something that moves of course. It's equally fun to see what happens when you smash your truck into the wall at top speed.


Some vehicles do unintended stunts! A complete 180 degree turn or interlocking wheels for the girls' team trucks. One intrepid truck climbs on top of another one. This can be fun, but the design brief is to try and make the buggy to go straight. Time to make sure the axles are parallel and the wheels aligned.


The classic wonky wheel problem is common. These CD wheels are nice and big -which means they have a higher gear ratio than little wheels. Their lightness is generally good too-because the buggy is not weighed down by its wheels. But-there's a bit of an issue with their tendency to flop over.


In this car. a design solution was using foam blocks to keep the wheels straight. Unfortunately this was not sturdy enough to support the chassis without the wheels tilting. Sometimes troubleshooting can be maddening -especially when you are running out of time. 


Here's one way to improve the wobbles. Remove the heavy body. And use attached wheel hubs. This car has a nice streamlined shape. Impressive how this designer worked his way through the design challenge.

A veritable tape marathon to keep the CD wheels straight and non-wavering.

In the second phase of this challenge we asked the kids to add a jet propulsion engine to their buggy. A balloon taped up to a straw is attached to the back of the chassis and works rather like a rocket booster. In theory, the air escaping from the straw-provides thrust which pushes the buggy forwards.


Perhaps two balloons will work better than one?


Best is a balloon with a short straw (to minimize friction for the escaping air). The placement of the balloon (and the direction the nozzle points in) is also critical to how well it works. The elastic quality of the balloon makes a difference too. Some types of balloons work better than others.


This car was light -and low on friction- and sped some way with this nice short balloon nozzle.


Another lightweight car -with three wheels and a craft stick frame -incredibly fast.

This was an great workshop of testing and improvement. Well done kids.


Thursday, 6 November 2014

Evil Geniuses

This week the design challenge was to build a contraption that can fling a boulder across the room.

from http://silverhawkauthor.com/book-siegecraft-no-fortress-impregnable_279.html

The Grade 5 and 6 students worked on constructing siege catapults (Roman Mangonel style). These required a very sturdy base and vertical support-no trivial matter when all you have to use is craft sticks clothes pegs and tape. The throwing arm was levered to the base with a bull clip fulcrum and stretched back with an elastic band. Pull the arm back and fling! Launch your foil boulder into the air.


Some of our budding engineers managed to improve their catapults-Elizabeth suggested more robust materials like wood and nails, Joseph and Jabeez worked out how to truss their structure. Zachary modified his catapult by adding a pull back tab and noticed that the angle of release and the size of the boulder affects how high and far it goes.


To build a prototype, test it, evaluate and improve it, is part of the design spiral we are teaching the kids.  In this workshop, the kids followed a set design plan, but then refined their catapults to improve their function.

from http://discoverdesign.org/design/process

Meantime the Grade 3 and 4 kids were evil geniuses in revolt. They decided to modify balloon slingshots into their own more exciting creations. Reinventing the workshop on the spot. There was a decadent looking "hugging slingshot" designed by Elektra, which spurred on the other kids to make crossbows and various catapult accoutrements.